User Guide
Getting Started
Install MeetIQ, sign in, grant permissions, and run your first meeting.
MeetIQ is a desktop app that listens to your meetings on your own machine — no bot ever joins the call. This page gets you from a clean install to a live meeting in about five minutes.
What you’ll learn
- Install and launch MeetIQ on Mac, Windows, or Linux.
- Sign in with Google or an email/password account.
- Grant microphone and system-audio permissions.
- See MeetIQ’s home screen ready for your first meeting.
Walkthrough
-
Download and install MeetIQ from meetiq.com/download. Pick your platform — the site auto-detects but you can override.
-
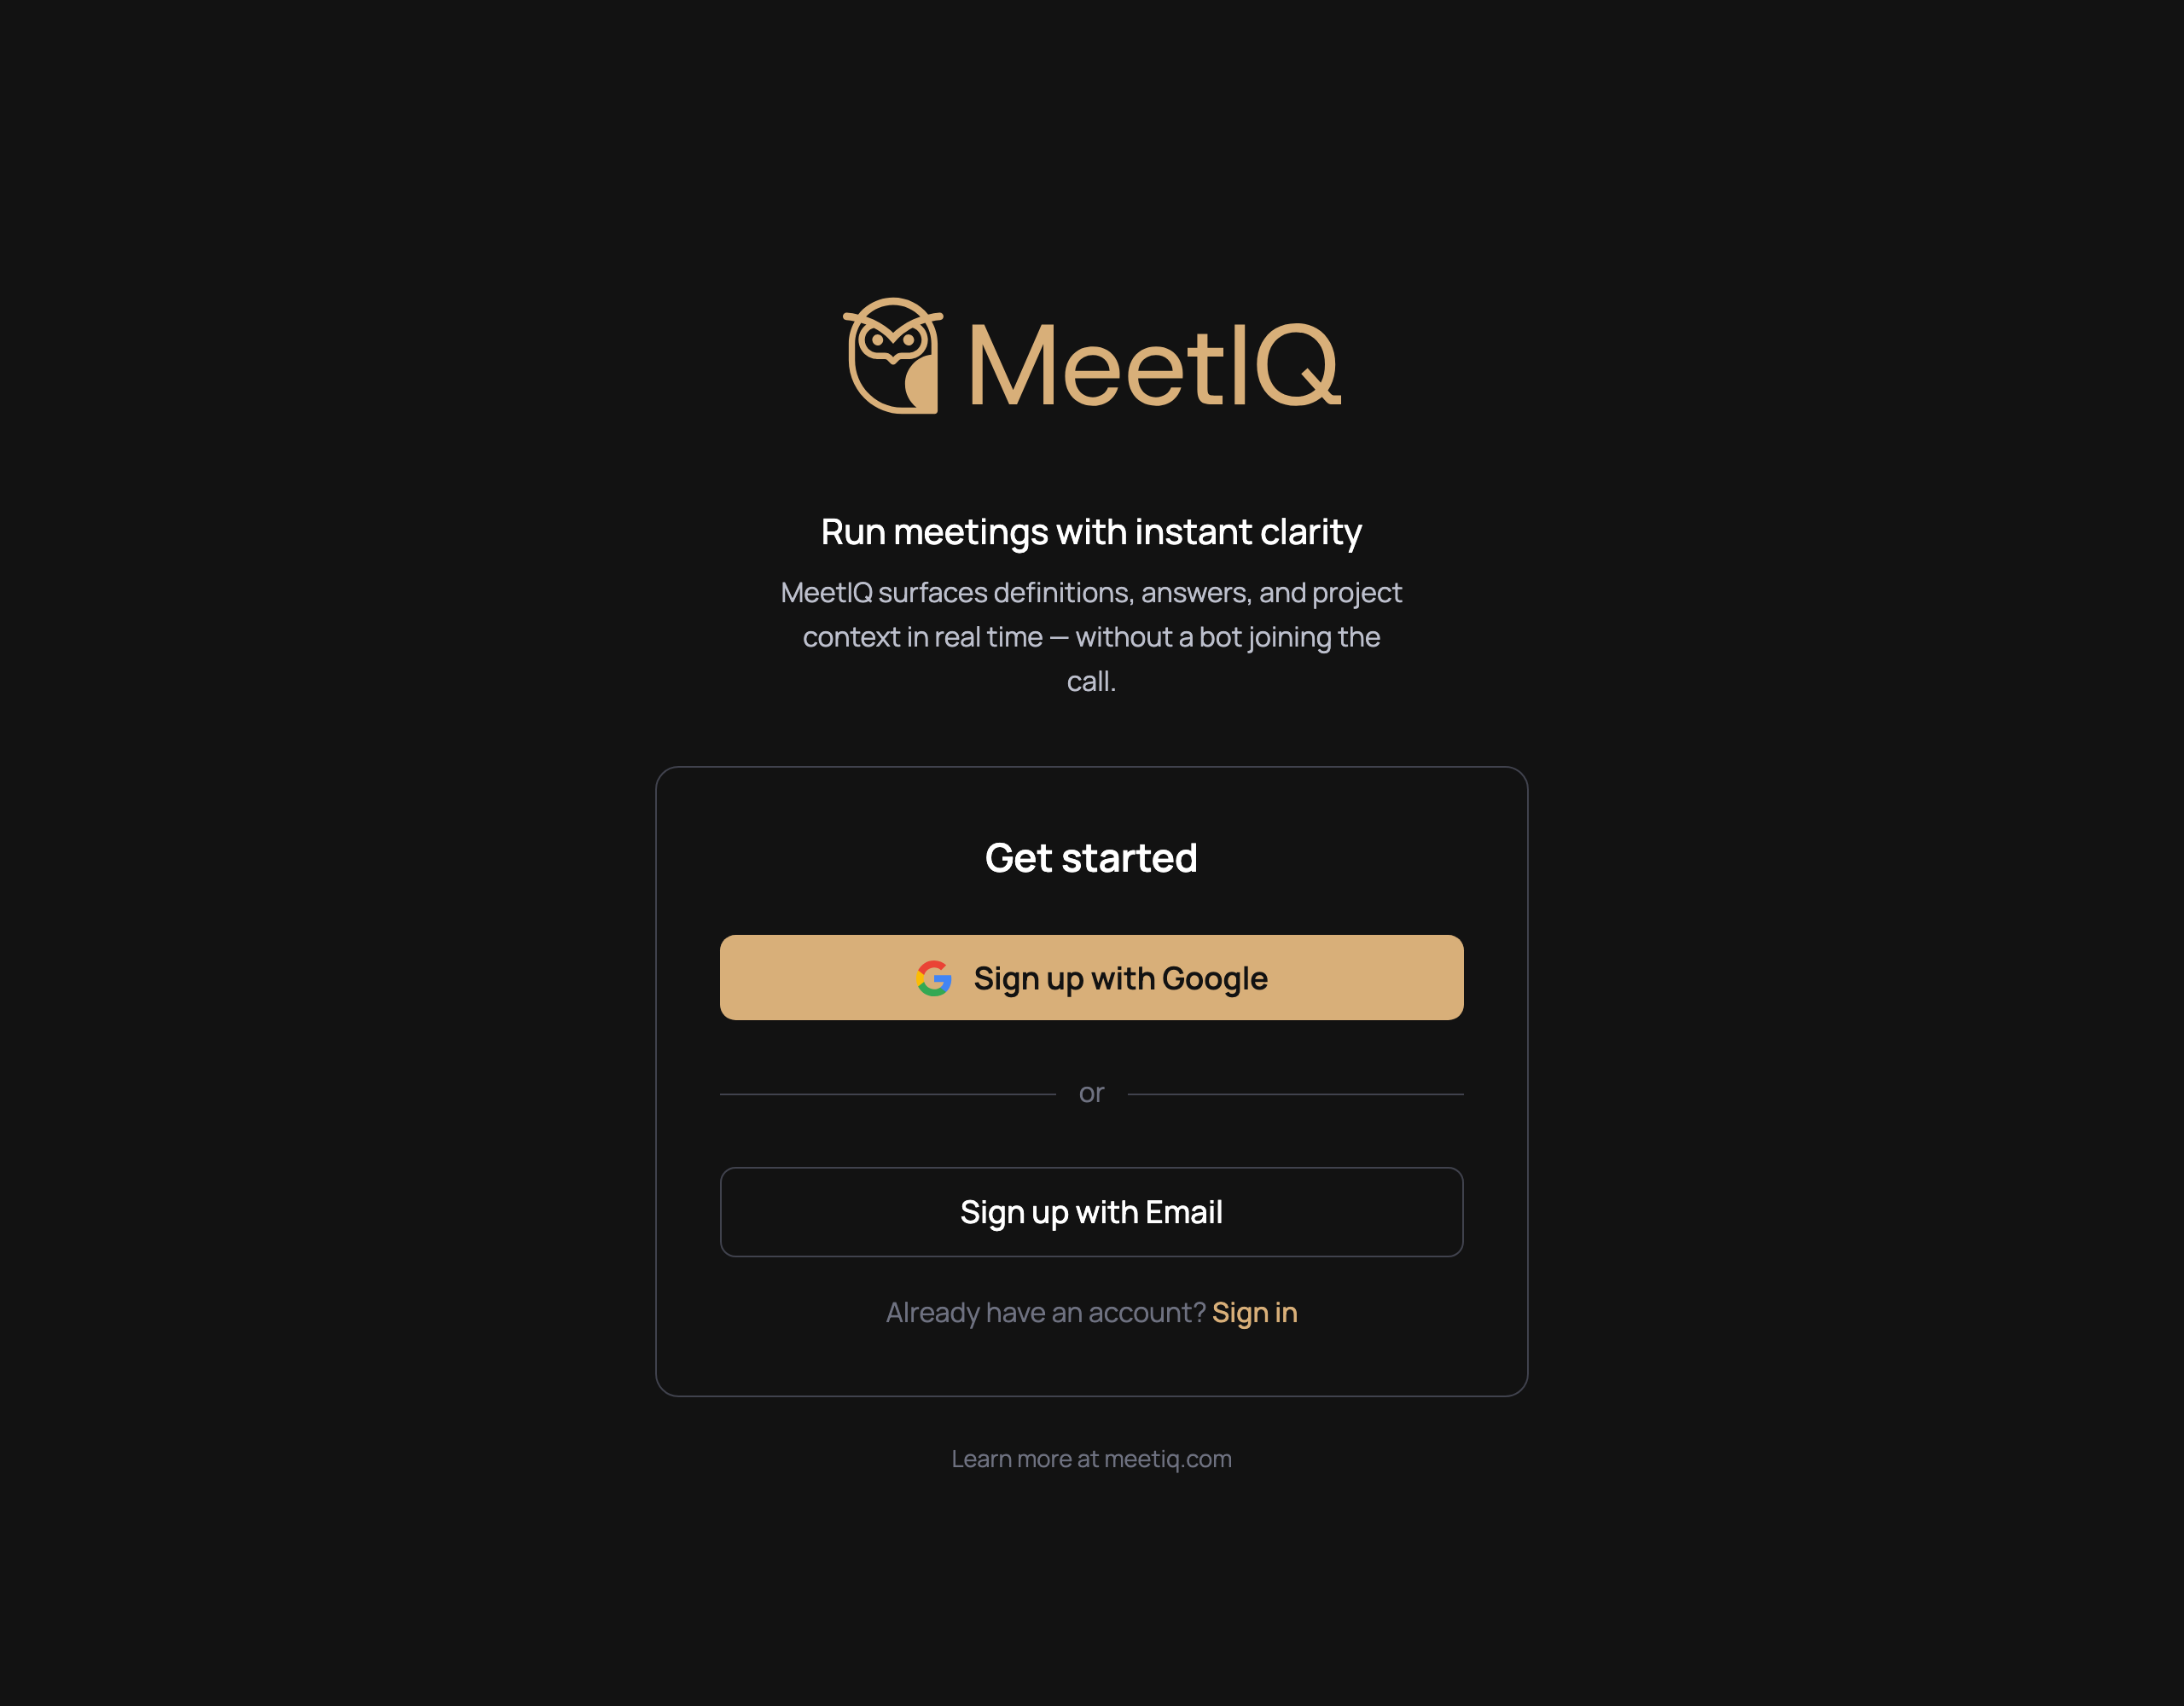
Launch the app and sign in. MeetIQ supports Google sign-in and email/password. If your organization is on Google Workspace, Google is the fastest path.
-
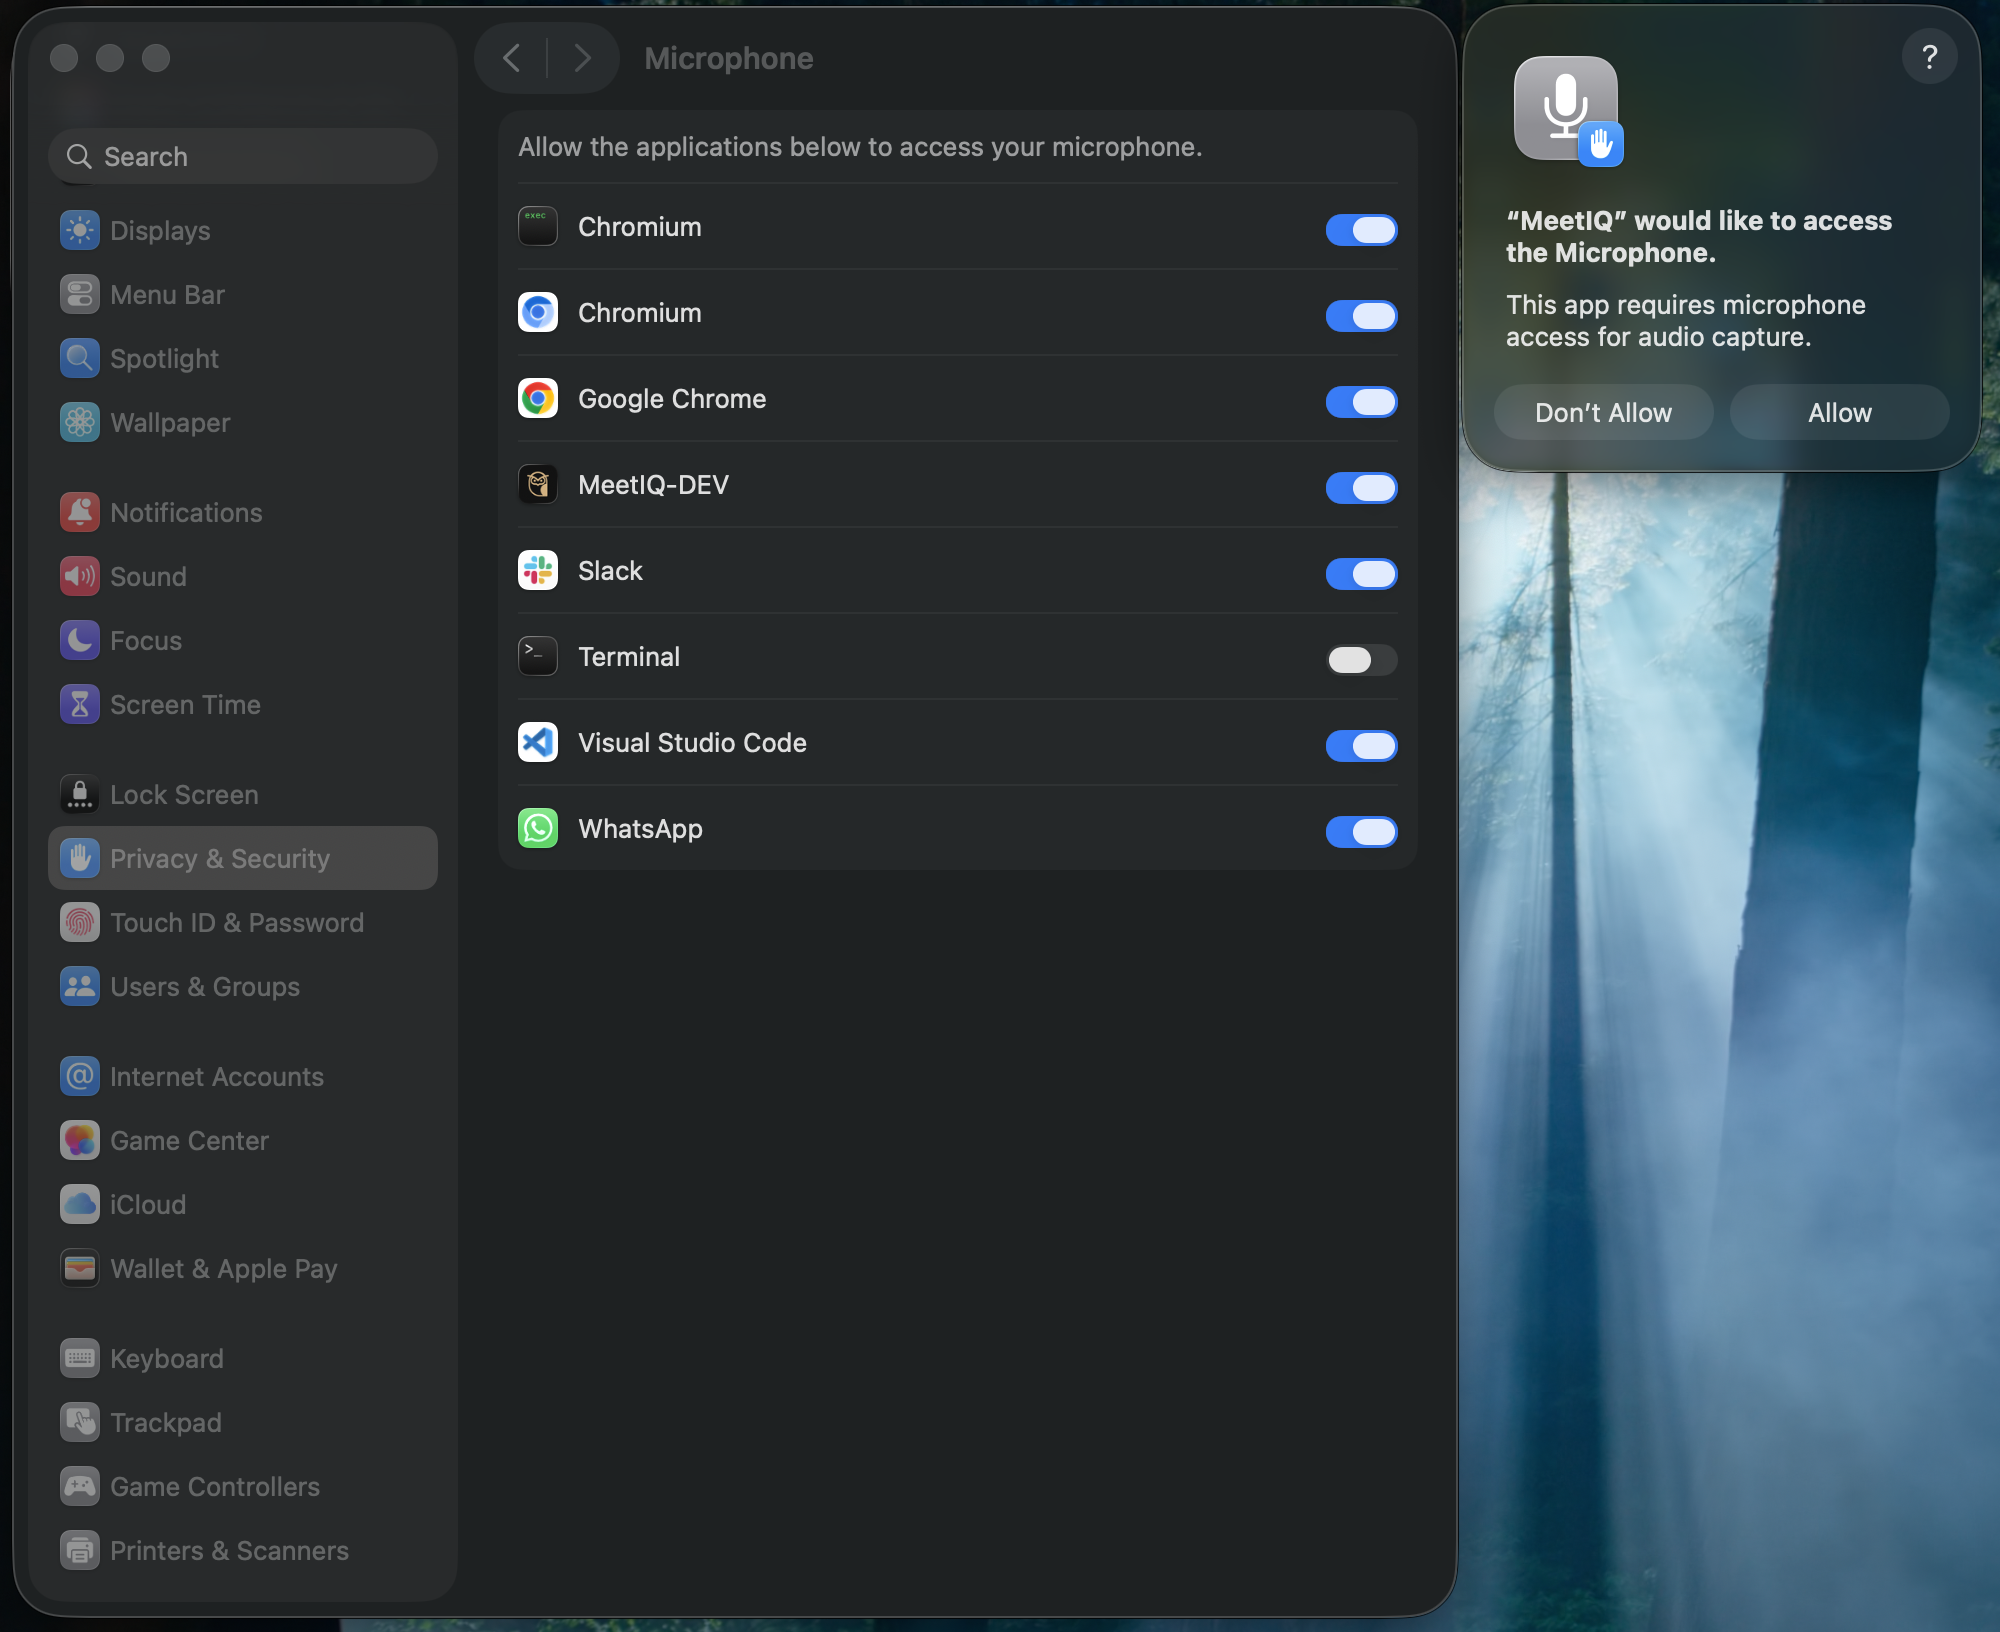
Grant microphone and system-audio permissions. On first launch MeetIQ prompts your operating system for the two permissions it needs to hear the meeting. On macOS this appears in System Settings; on Windows and Linux the browser handles it inline.
-
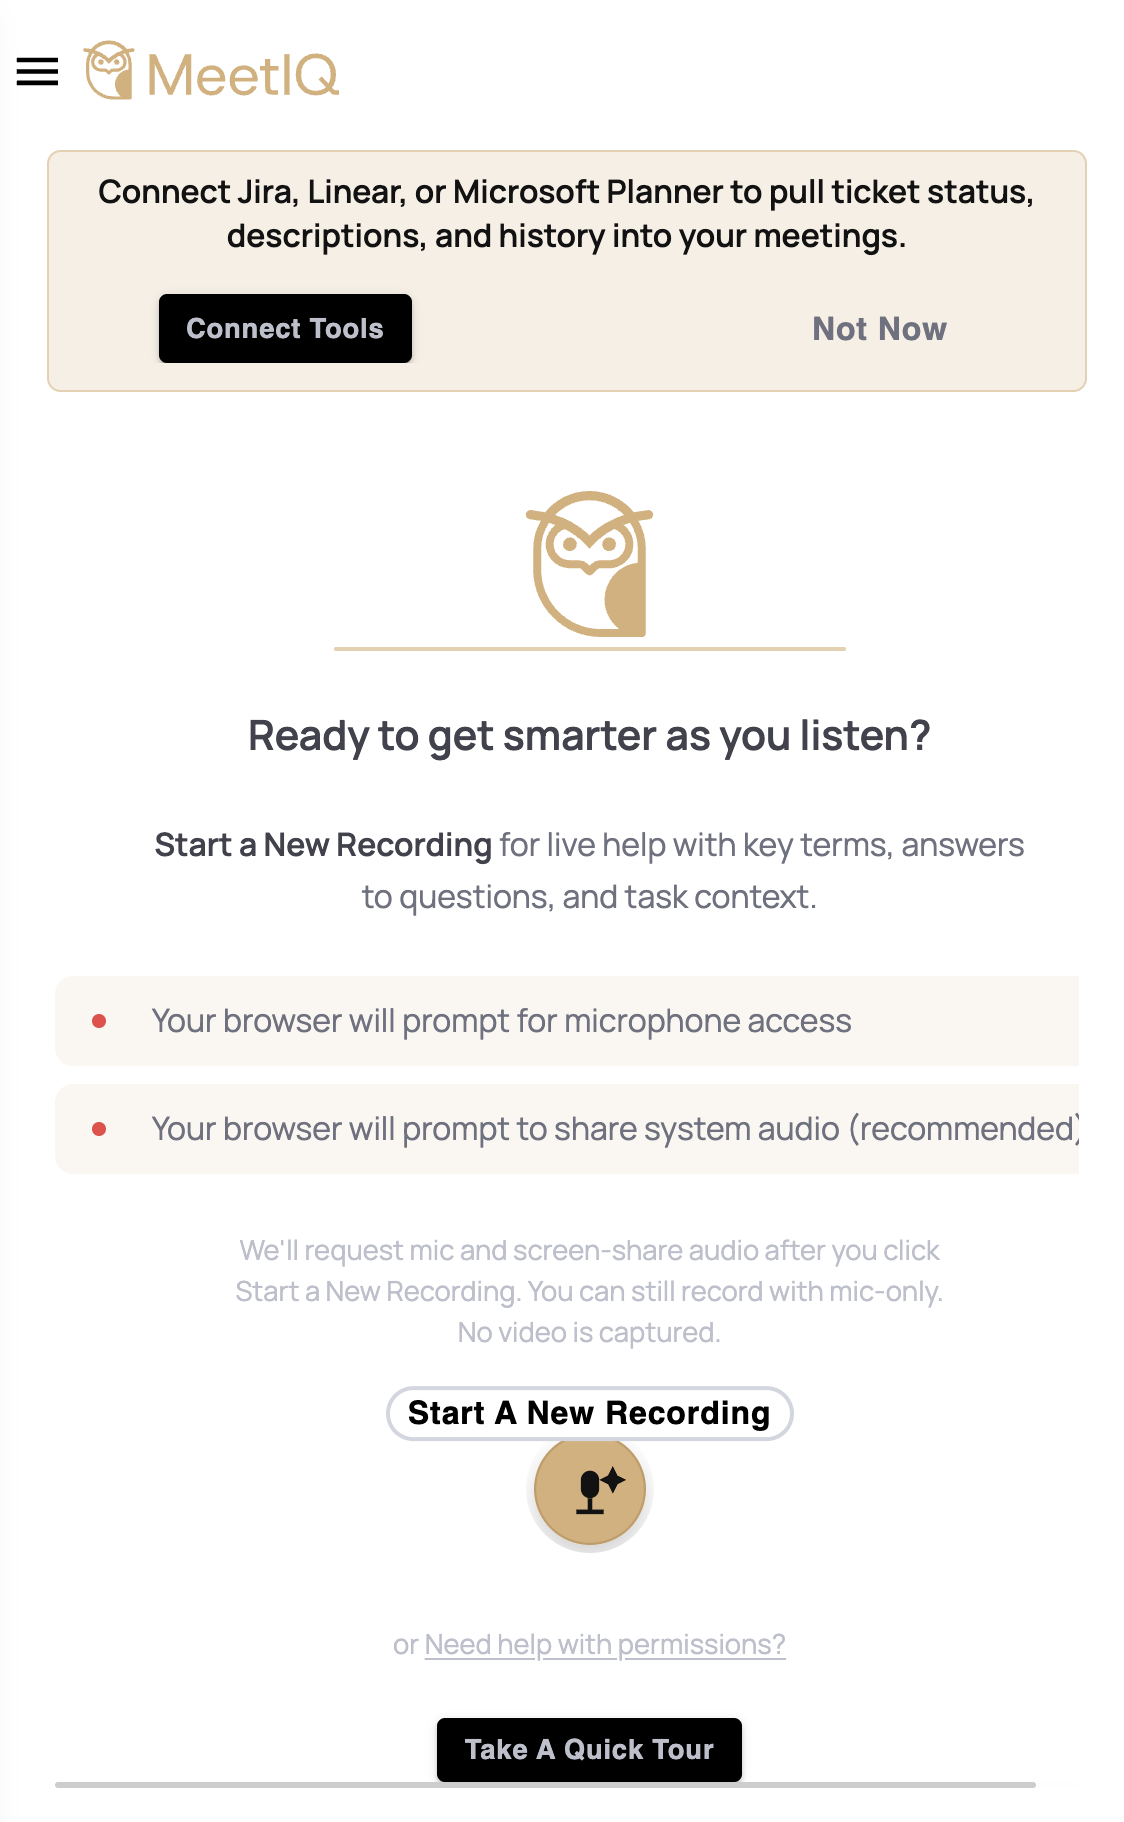
On a fresh install, both permissions start denied. Click record button once — MeetIQ will trigger the system prompts you need to approve.
-
Approve the microphone prompt when macOS surfaces it.
-
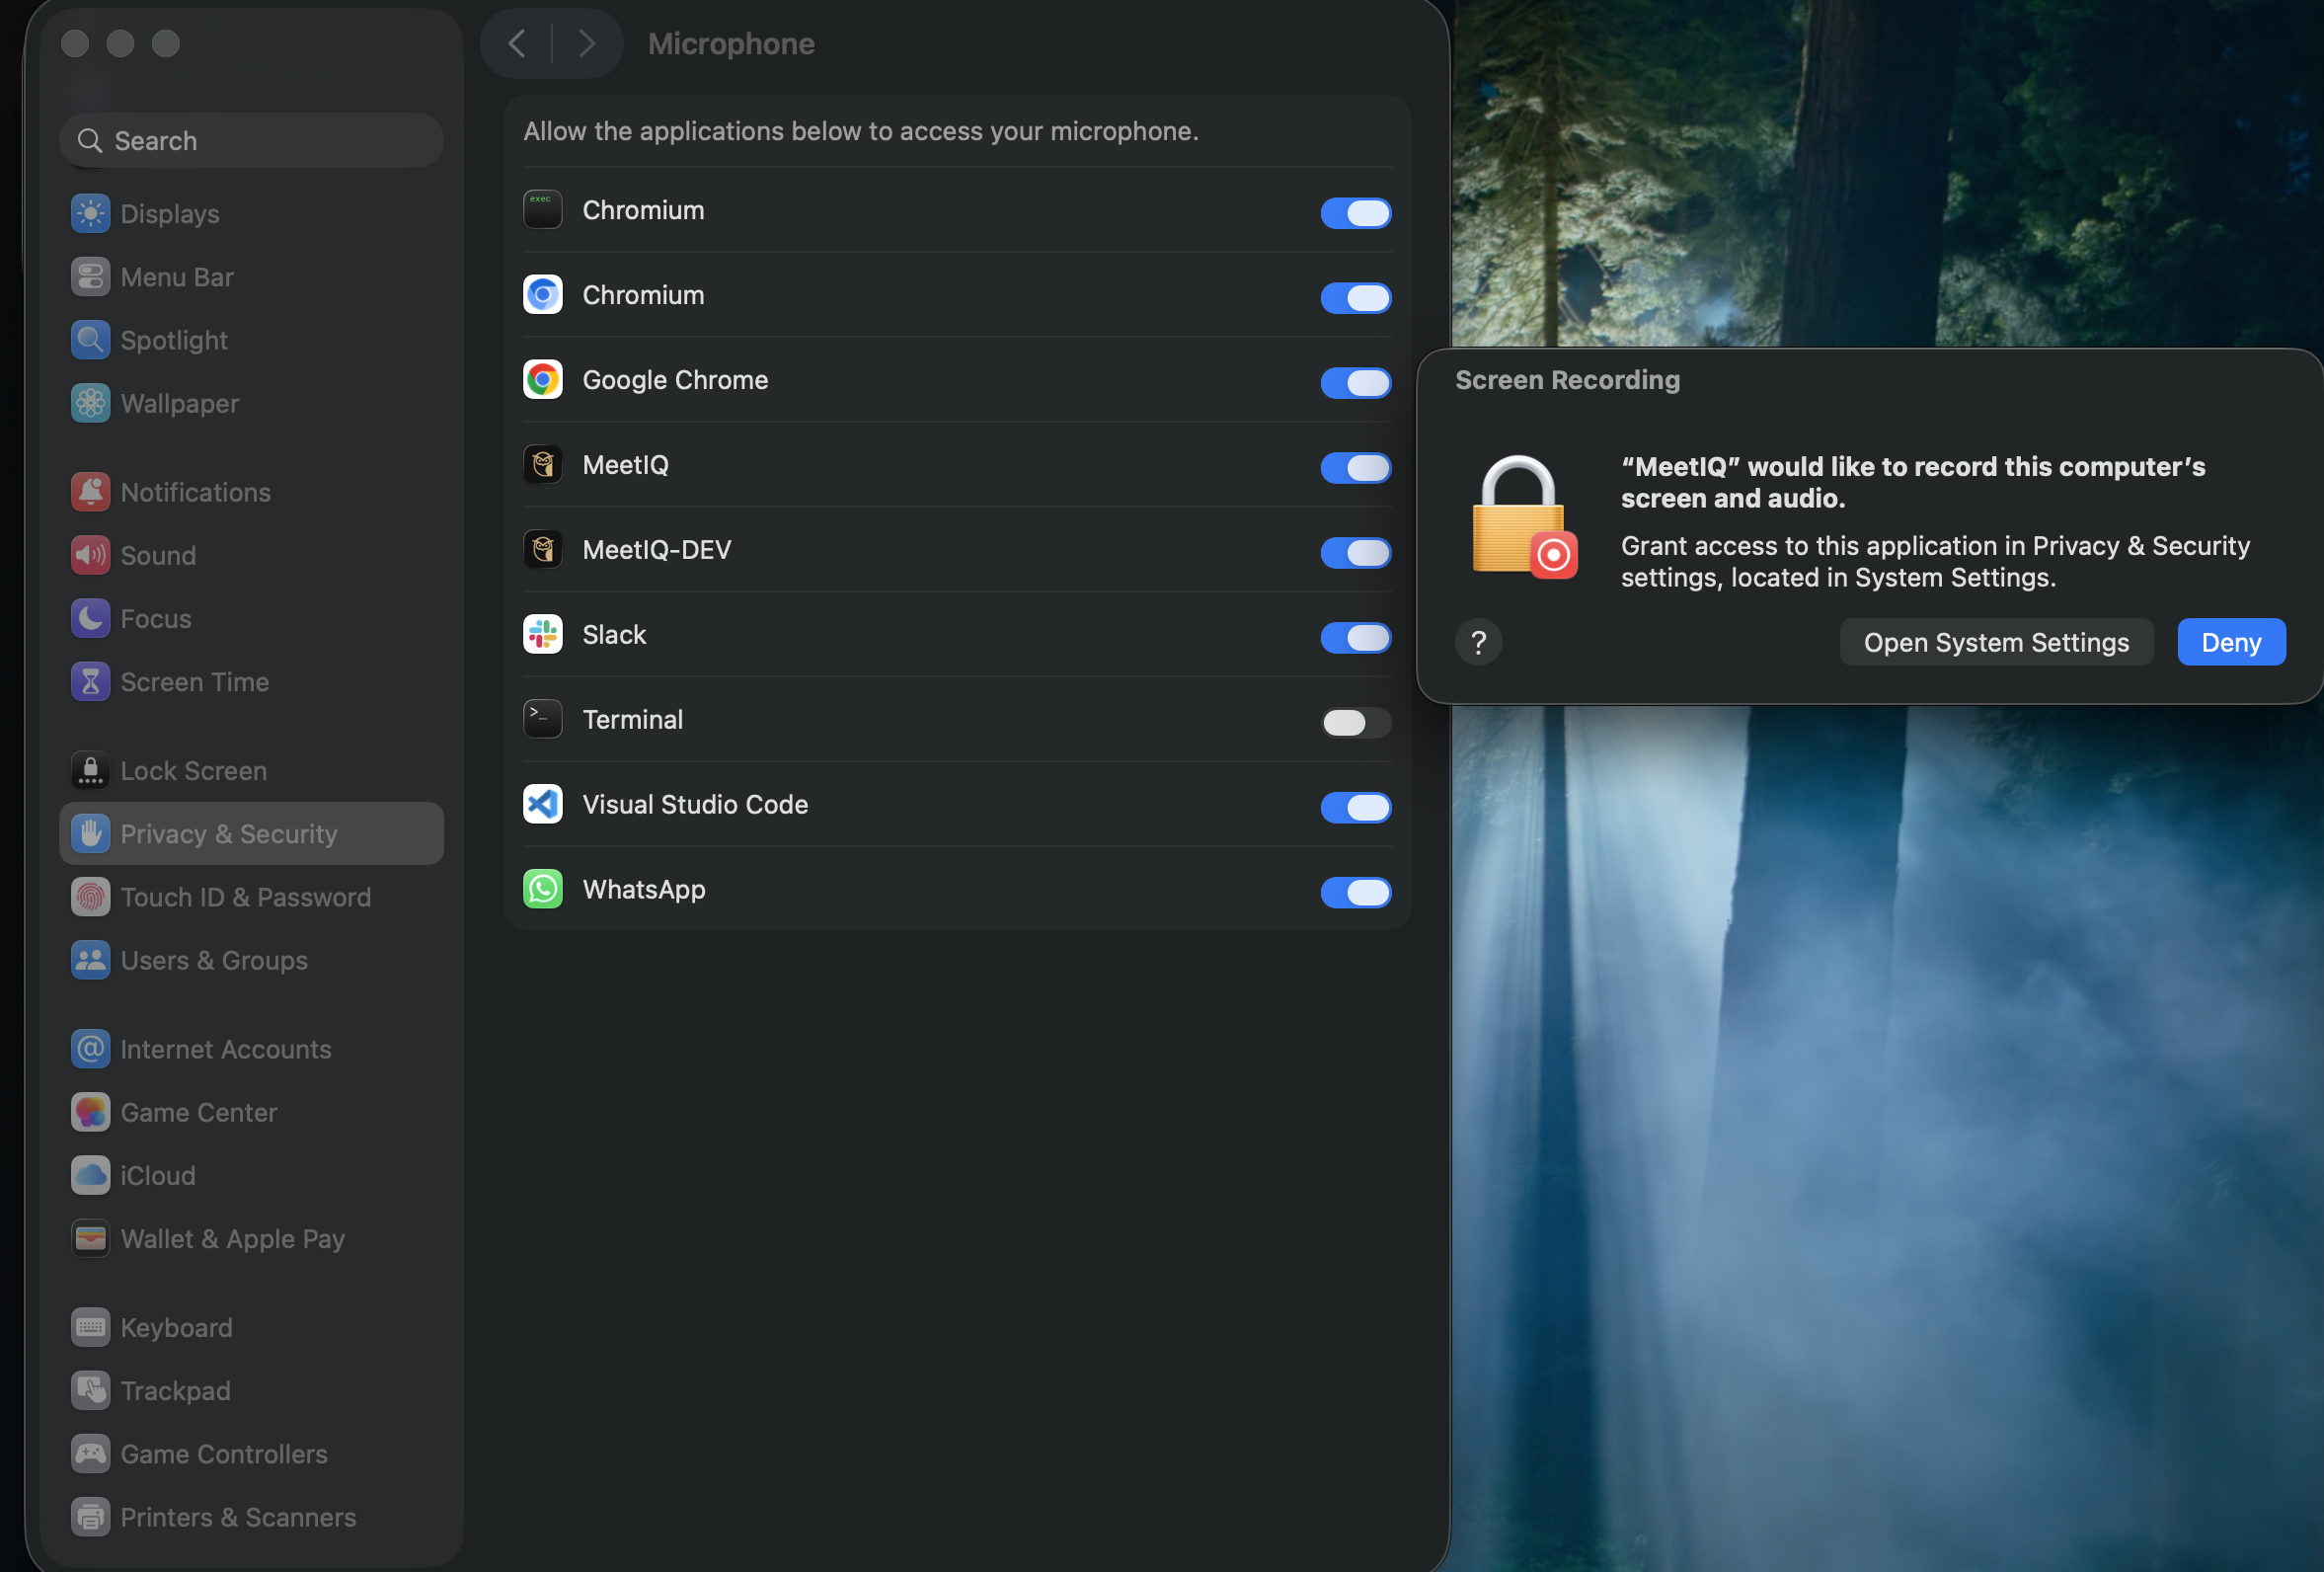
Approve the screen and system-audio prompt that follows.
-
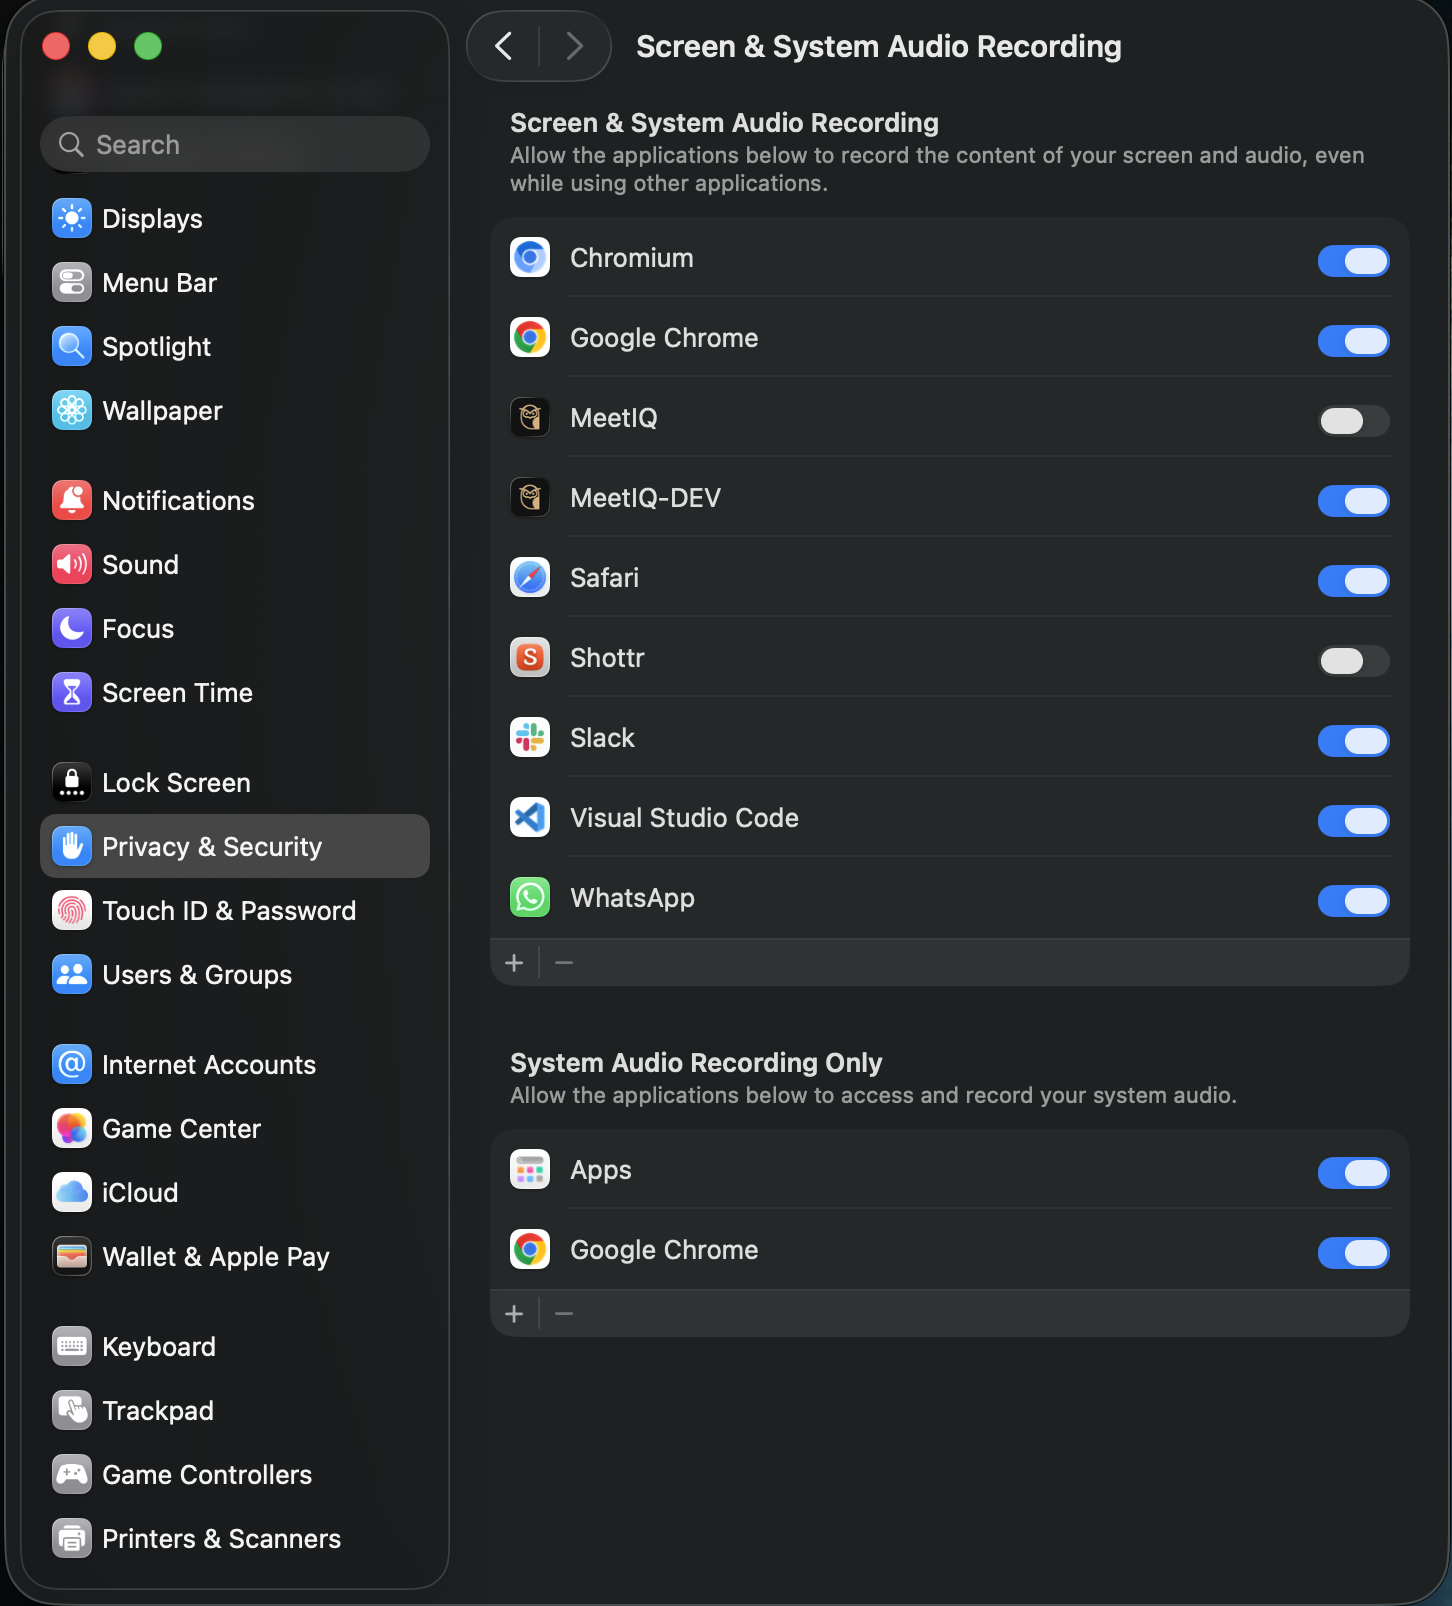
If the Screen & System Audio Recording toggle in System Settings is still off, switch it on.
-
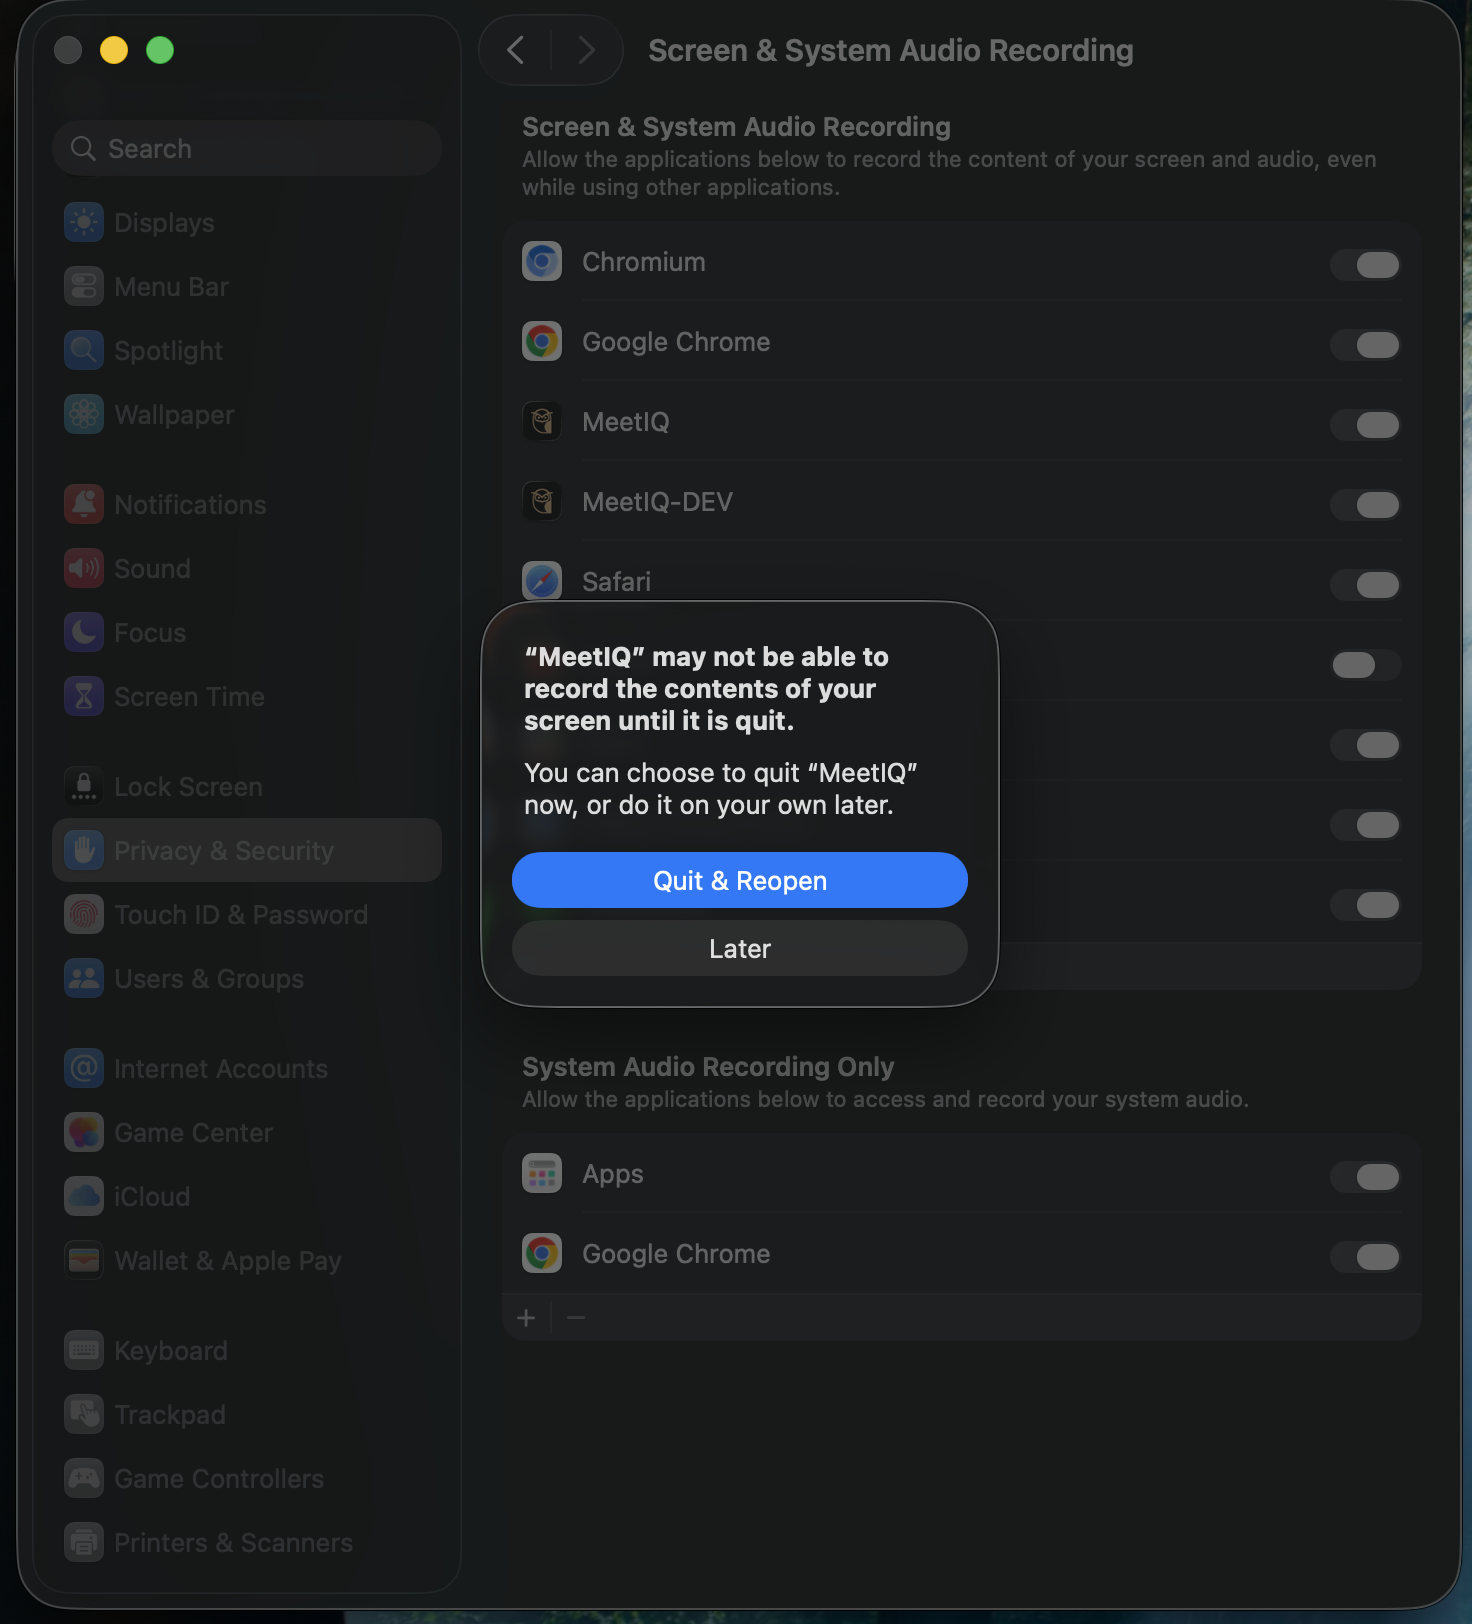
macOS will prompt you to quit and reopen MeetIQ so the new permission takes effect.
-
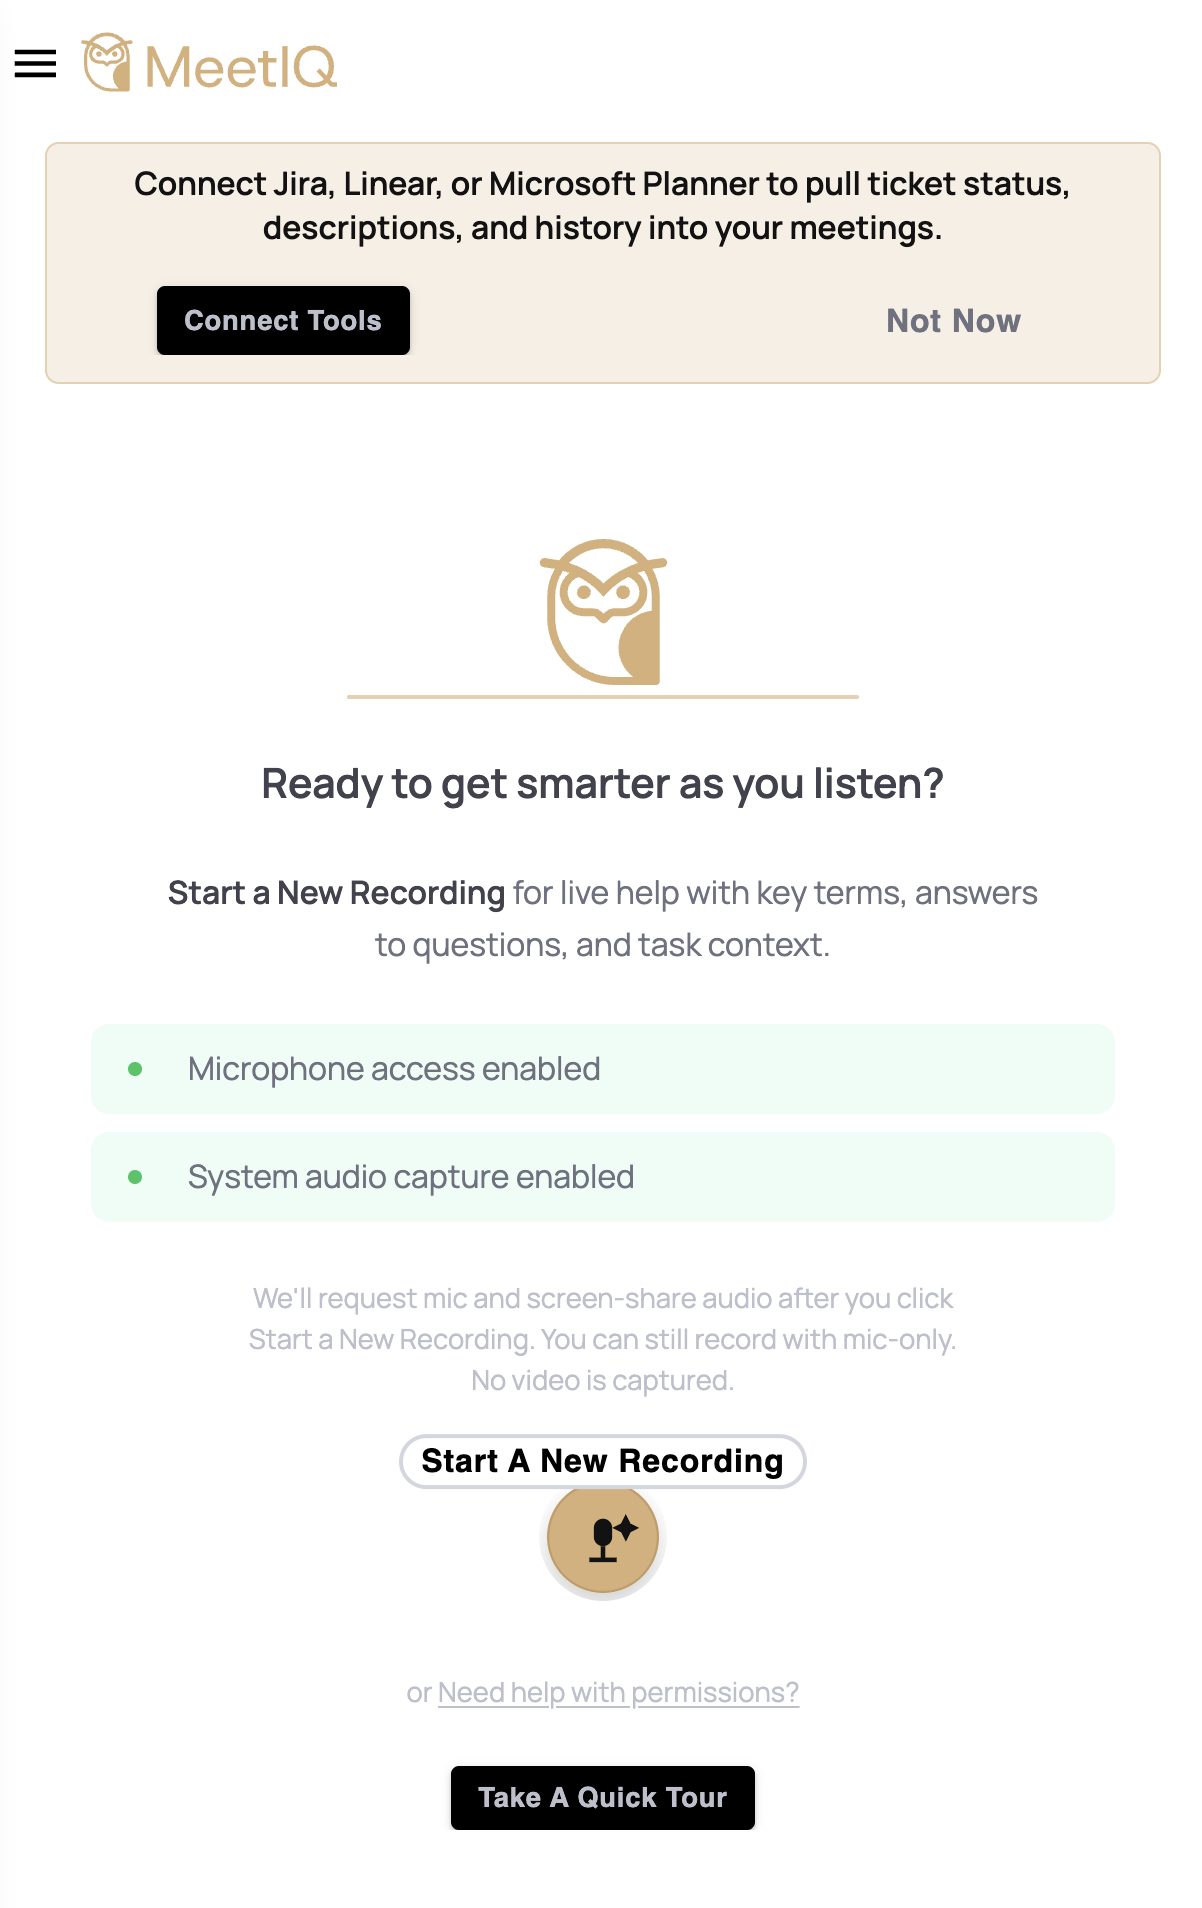
On relaunch, MeetIQ picks up the granted permissions and the record button becomes active.
On Windows, both permissions are granted inline through the browser’s built-in prompts the first time MeetIQ tries to capture — no System Settings visit needed. On Linux, PipeWire (or PulseAudio on older distros) handles both streams together; the first-launch microphone prompt from your desktop environment is usually enough.
-
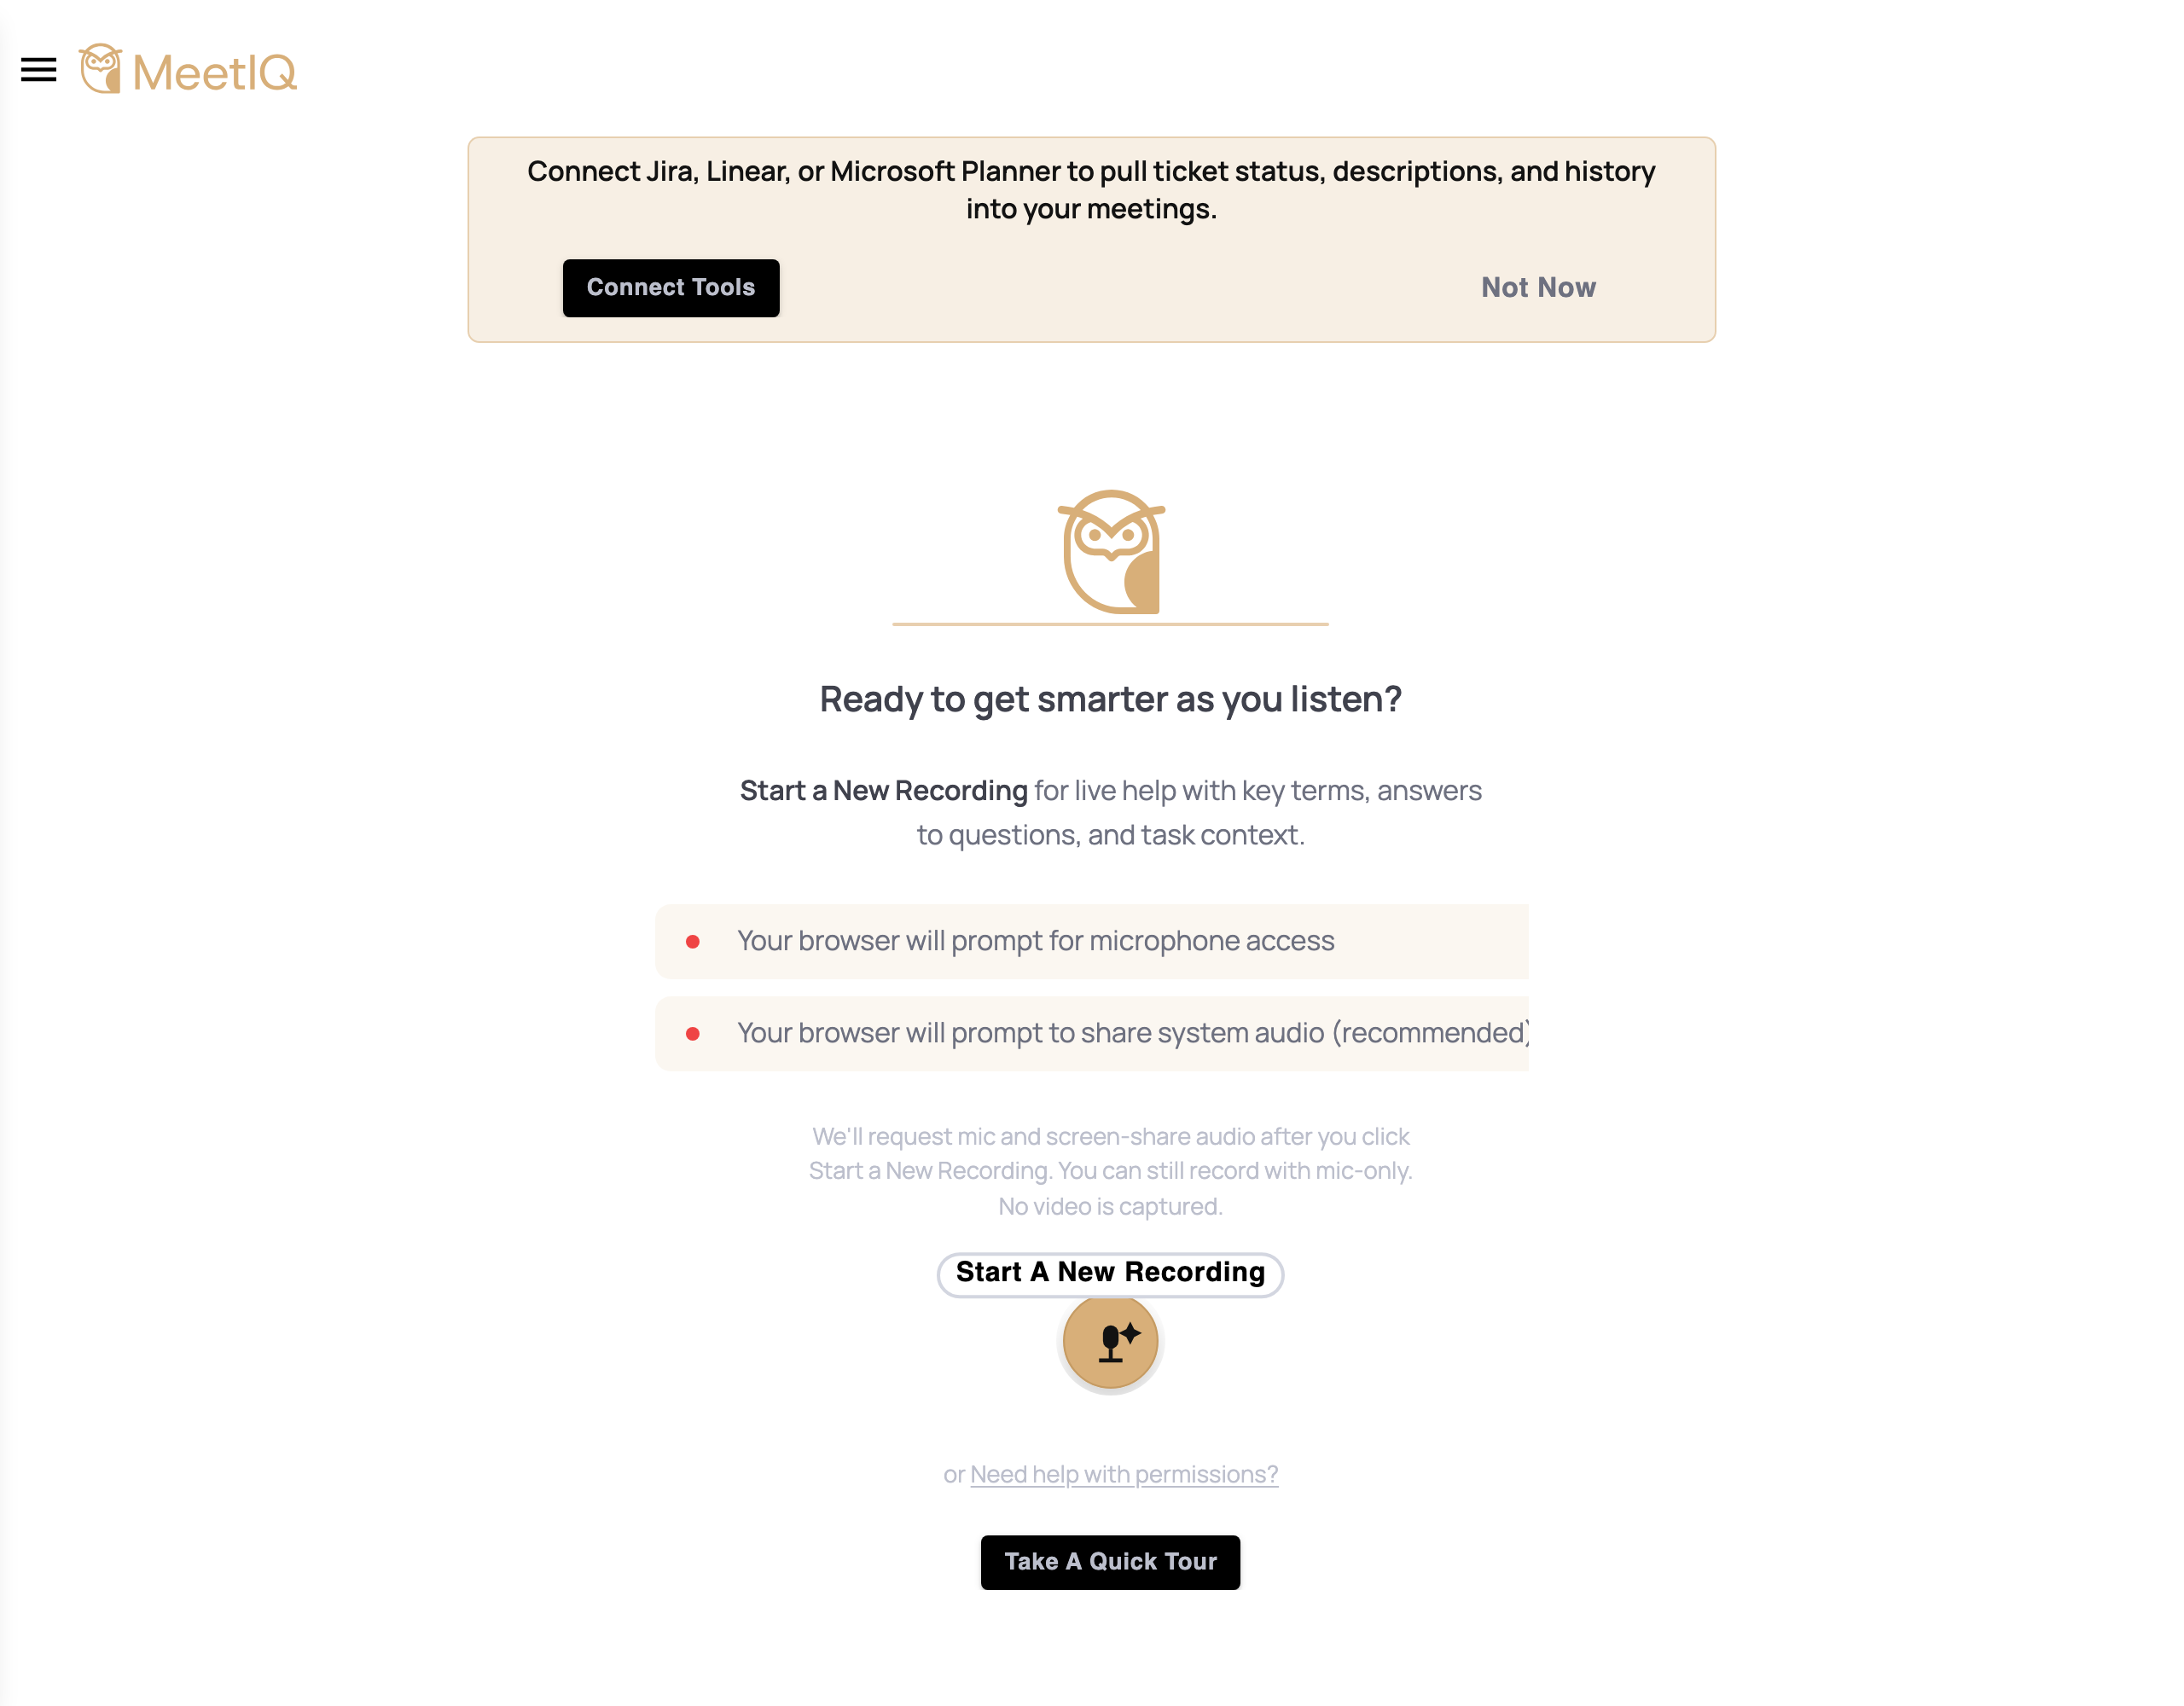
You’ll land on the home screen. The record button sits at the bottom of the window and is the only thing you need to know to start a meeting.
How it works
MeetIQ runs entirely on your device. Audio from your microphone and your system output (Zoom, Meet, Teams, or a physical mic) is transcribed in real time and analyzed for the terms and topics being discussed. Because nothing joins the call, meeting participants don’t see MeetIQ, and nothing is uploaded to a shared calendar or transcript service.
Sign-in uses AWS Cognito behind the scenes, but you’ll only see the familiar Google or email/password prompt. Once you’ve granted the OS-level permissions once, they persist across relaunches — you shouldn’t see the prompts again unless you reset system privacy settings.